Adobe Photoshop is an image editing software developed by Adobe Inc. It is very popular among web designers and image editors and it is also widely used by many professionals all over the world.

Adobe Photoshop
For those who are stuck at bring in “Tables” in the Adobe Photoshop, Here in this article presents you step-by-step instructions for “Easy way to create and resize tables in Adobe Photoshop”
Step 1: Open your Microsoft office and create a new document word file.
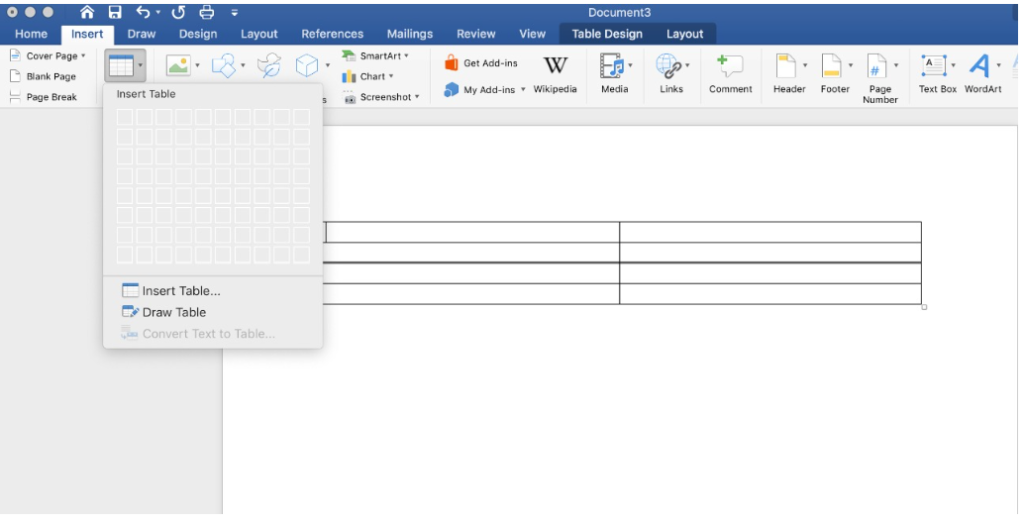
Step 2: Click the “Insert” menu in that click the “Table” option. Insert the table as many rows and columns as you required.

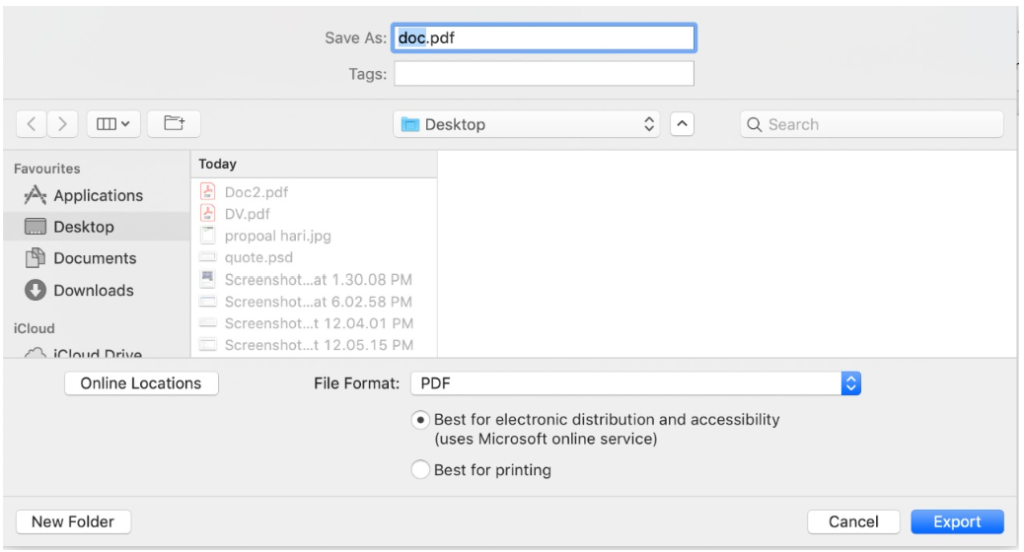
Step 3: Save the file in “PDF” format.

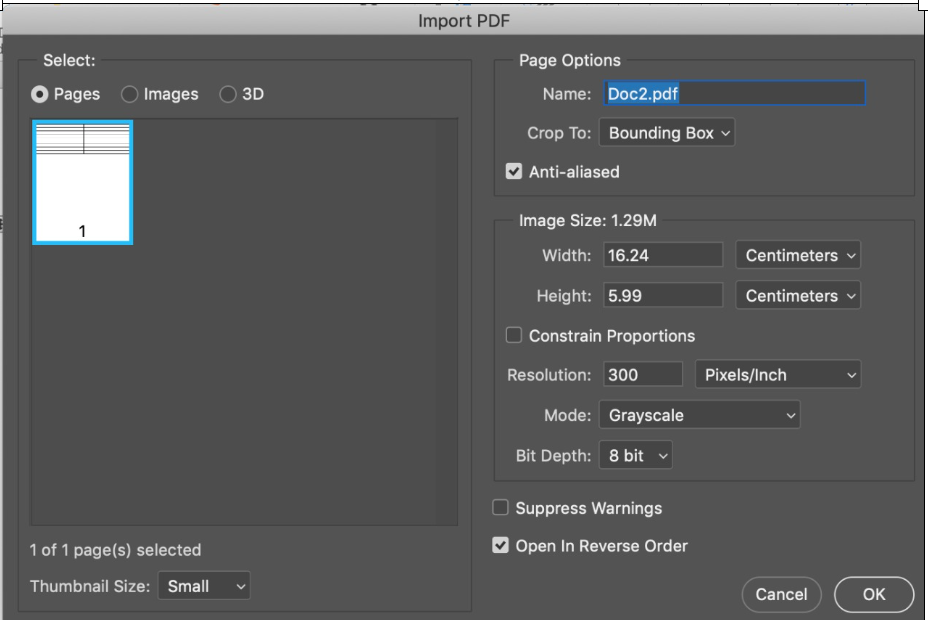
Step 4: Now go to Adobe Photoshop & open the PDF file as you saved earlier.

Step 5: Copy all cells by pressing Ctrl+A and Ctrl+C.
Step 6: Now open the new file and paste the tables by Ctrl+V.
Step 7: Here, as a whole, you can resize the entire table by pressing Ctrl+T. Also, you can select the particular range of rows and columns then resize it.
That’s all; you successfully create and resize the table in Adobe Photoshop with the help of Microsoft Word.
Hope this guide will save you time and enhance your designs well.
Follow us to find more interesting topics & posts to read!
